
Ultrasound Camera UltraCam LD 500/510
uses 30 MEMS microphones for the Calculation and visualisation of the ultrasound image. The device also makes inaudible ultrasound audible.
Ultrasound propagates through air and can be reflected off hard surfaces. Typical reflective surfaces include concrete floors, glass, Plexiglas, sheet metal cladding, smooth machine casings and metallic surfaces. Put simply: the angle of incidence equals the angle of reflection.
Reflections can lead to a misinterpretation of the sound’s origin. In this case, a hotspot is displayed on a reflective surface, even though the actual leak is located elsewhere.
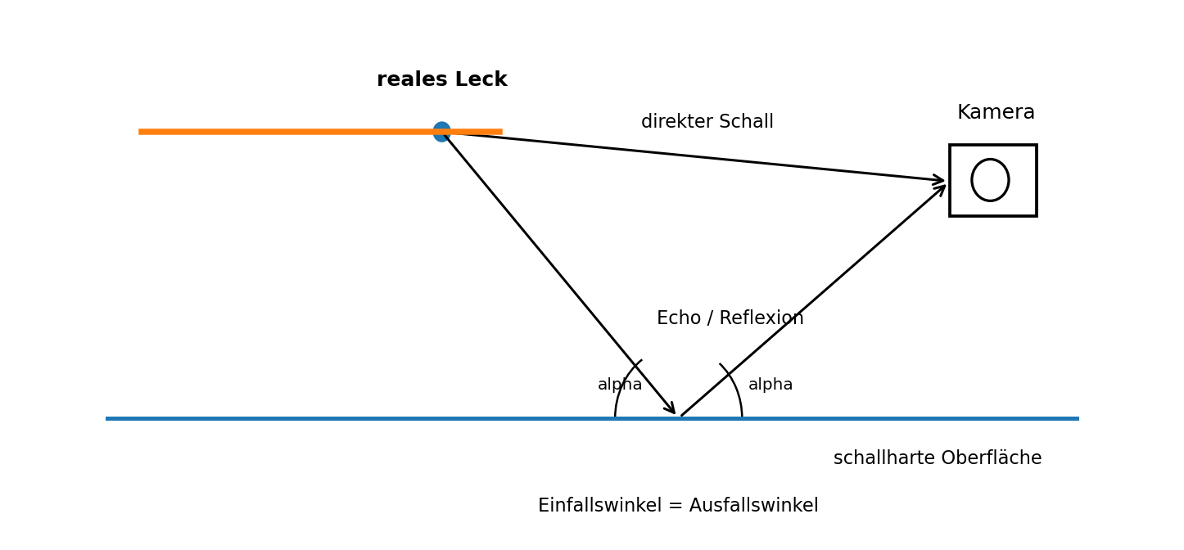
Reflection from a sound-reflective surface: In addition to the direct signal, an echo may be generated which appears on the display as an apparent sound source.
Mesh screens and protective fences are often largely permeable to ultrasonic waves. The sound waves can pass through the openings, meaning that sound sources remain visible even when located behind the barrier.
In contrast, solid surfaces such as Plexiglas, glass, sheet metal, concrete or smooth machine casings act as strong reflectors. They can bounce the ultrasound back, thereby creating reflections or seemingly displaced sound sources.
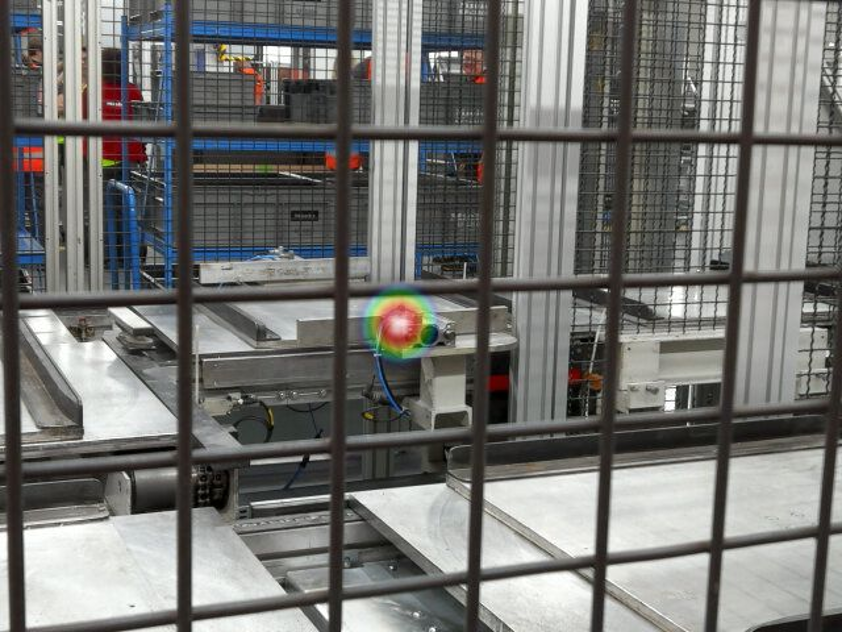 | 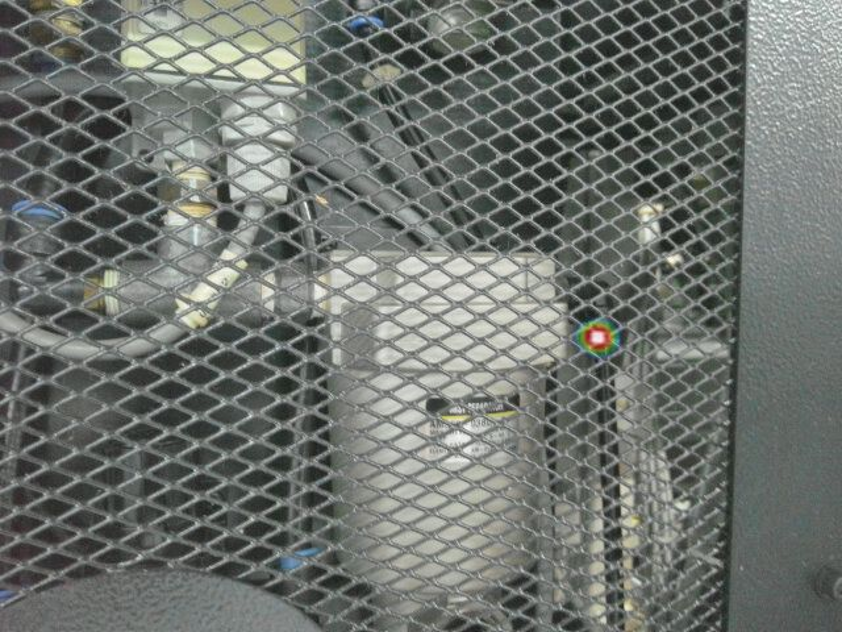 |
| Protective grilles can be largely acoustically transparent to ultrasound. The hotspot remains visible despite the barrier. | Example of localisation through a mesh screen. Solid panes or surfaces, on the other hand, can strongly reflect ultrasound. |
Where barriers are closed, measurements should not be taken through the surface. If it is not possible to open the casing whilst the system is in operation, a measurement point with a direct acoustic line of sight to the pressurised components should be selected.
In the example shown, an open gap in the Plexiglas casing allows a direct sound path between the leak point and the microphone array. The solid Plexiglas surface is not used as a measurement path in this case.
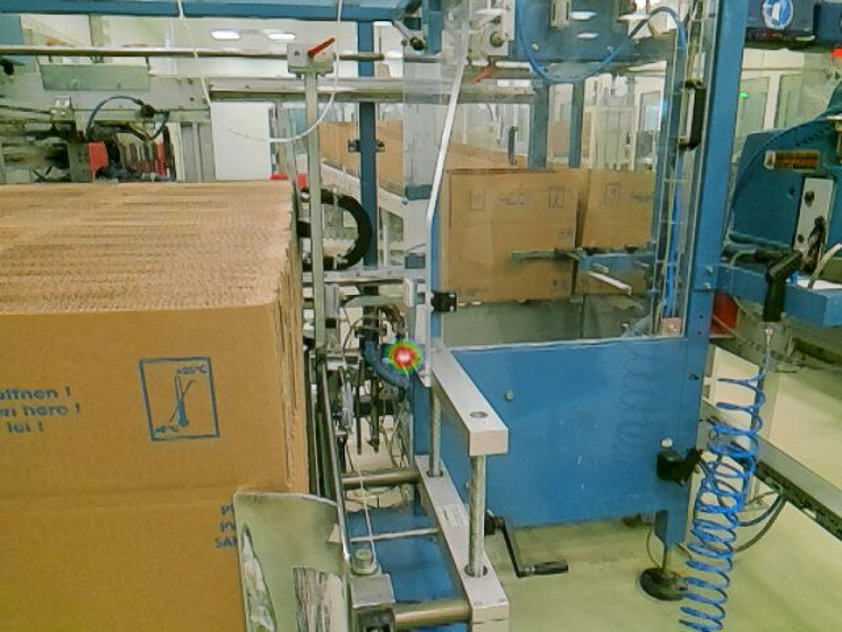
Leak on a packaging machine with a Plexiglas enclosure. The measurement is not taken through the Plexiglas, but via an open gap.
The most important step in the inspection is to change the viewing angle. A real sound source remains visible on the same component even when the camera position is changed. Reflections, on the other hand, change their position or disappear completely. In case of doubt, the sound source should be checked from at least two different positions.
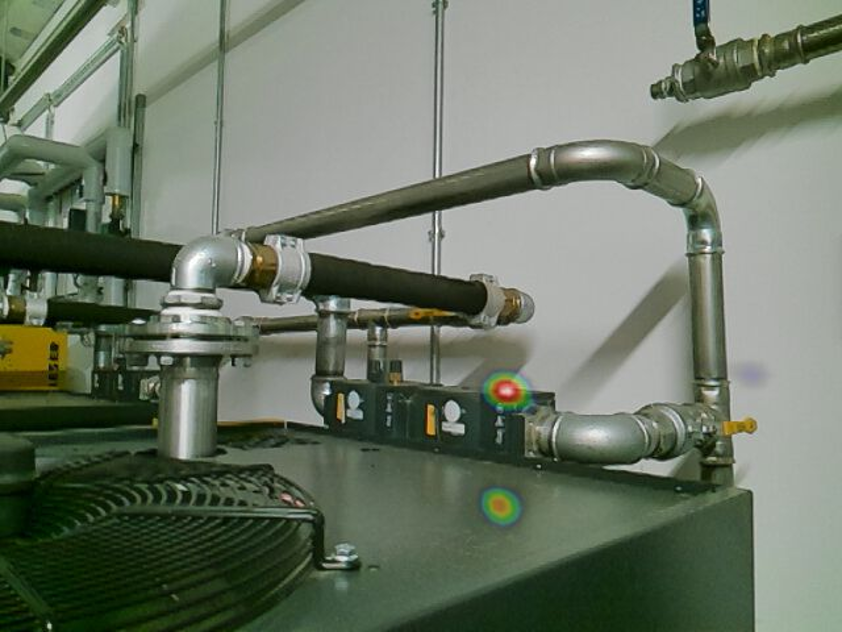
Direct sound and reflection: The actual leak is located on the pressurised component; an additional hotspot may be caused by reflected sound waves.
| Observation on the display | Probable cause | Recommended action |
| Hotspot remains consistently visible on a valve, hose or pipe | Actual sound source | Change your viewing angle and check the position of the maximum level |
| Hotspot moves across the floor, wall or a smooth surface | Reflection / echo | Change the camera position and check whether the hotspot changes position |
| The hotspot appears behind Plexiglas or a closed panel | Reflected ultrasound or shielded sound source | Look for an open area or gap with a direct sound path |
| Multiple hotspots in the event of a severe leak | Direct sound and reflections | Prioritise the nearest hotspot on the pressurised component |
uses 30 MEMS microphones for the Calculation and visualisation of the ultrasound image. The device also makes inaudible ultrasound audible.

Detects multiple leakages simultaneously with globally unique Power Beam Forming. 4th generation technology - also suitable for other gases. Helps to locate and repair leaks - including cost estimation and ISO 50001 documentation.